Showing posts with label Family. Show all posts

Monday, December 2, 2013

Family Photo Cloth Book- Creating the Image


 Hi Everyone!

I've gotten a few questions about how to create the image for the family photo cloth book.  I'm going to do my best to explain this, but feel free to continue to ask questions.  I'm not a photoshop expert so I'll just explain it all the best I can!

 As I said before, I ordered a fat quarter of my fabric from Spoonflower.  A fat quarter is 18”x21.”  In order to have 10 images plus a front and back cover, each image will need to be 6” tall and 5.25” wide.


Start by determining your cover.  I used a pattern that I scanned into my computer and added a picture of my daughter.  Whatever your cover, create an image that is 6” tall and 10.5” across (for front and back cover).  To do this, choose Image>Image Size and then adjust size in inches.


Now go to Image>Canvas Size and adjust the canvas size to 18”x21.” Set it so that it will extend down and to the right.


Open your next image you would like and adjust that image to be 6”x5.25.”  Select all and copy image.


Now go to your first image (the large one with cover) and paste next image.  Move image until it is next to the right of the cover.


Repeat Steps 2 and 3 and continue to paste onto your cover image until you have filled in all of the pages.

To add the color blocks with names, choose the Draw Shapes tool and draw a colored rectangle at the bottom of each image.  Finally, use the Text Tool to add the names at the bottom of each page, over the rectangles.


When finished, make sure the save as a jpeg.

Thursday, November 7, 2013

Family Halloween Costume- Rock, Paper, Scissors

Wow.  The last few weeks have been quite the whirlwind.  One case of bronchitis and a lot of packing later, and we now are living in our brand new home.  During that time, my major craft project was making our Halloween costumes.  Can you tell what we are?

Paper covers rock, rock crushes scissors.

Rock paper scissors.  Scissors was made after the move with a bare minimum of craft supplies unpacked so you really have to use your imagination.  The shirt is supposed to be the handles (with the arms forming the circles) and the legs are the blades.  I found the silver fabric at Goodwill.  I was pretty excited :)

Ok.  I guess we all get along after all.

It was actually a pretty easy costume.  My paper skirt was made by drawing lines on felt and sewing the pieces onto a thrifted white skirt.  My t-shirt was based on this one, although I used sharpie.  Rock baby was made by sewing flannel onto a thrifted fleece outfit and hat.

Thursday, June 14, 2012

Father's Day Present- From Baby

Here's a quick and adorable Father's Day present you can make for all the new dads in your life.  A little "I Love Daddy" onesie.


All you need is a plain onesie and some fabric markers.  I found my onesie at a thrift store.  For the markers, I used my new Sharpie Stained markers


To prevent bleeding through, place a book or something inside the onesie.  Start by drawing a heart on one corner of the onesie.  Fill it in.


Now trace your heart and add in your words.  I kept my design simple, but you could always add more or use different colors.


Monday, April 30, 2012

California Dreamin'

I spent last week with my husband's family in San Clemente, CA.  It was a week filled with relaxation, sun, and the color blue.  I painted my toes blue and wore blue shoes.  I also had a new blue swimsuit.


One day, we drove up to Laguna beach to check out the sites.  We drank coffee and walked by the beach.  We also stumbled upon an awesome store called Twig.  I bought a bracelet with watches printed on it and a travel mug that says "Don't Stop Believing."


The house we stayed in was beautiful.  We were close to the beach and could watch the gorgeous sunsets from our porch.


In the front of the house was this cute little chair set.  We don't have room for something like this in our apartment now, but maybe someday.


How was your week?  Do anything fun or relaxing?

Wednesday, April 4, 2012

Birthday Party Recap

My birthday was a week ago and we celebrated with a party on Saturday night.  Some friends were kind enough to host it and it was a wonderful night.  We started with both cheese and chocolate fondue.  And yes, we had way too much food.


To top it off, my sweetie of a husband made me a TARDIS birthday cake.  He always makes me fun shaped cakes and this year he was inspired by my Doctor Who obsession.  It's a little droopy on the edge, but that's just one of the hazards of time travel.


Here is a picture of Eugene and I together.  You can see my new bangs and awesome bird shirt.


One of my friends gave me this beautiful vase as a gift.  I love it!  I added some fake grass from Michaels and put it in the front entry way.


I like the way it contrasts with my scarf tablecloth.  Now the only question is how long I can keep it there before the cat starts chewing on the grass and I have to move it.


How was your weekend?  Did you do anything fun?

Friday, March 2, 2012

Goin' to Kansas City- A Blog Break

Hello lovely readers.  I will be in KS all next week visiting family so I will be taking a break from the blog.  I'll see you back in a week with some fun new posts.  Have a great week!

The Plaza in Kansas City- My birthday in 2007- It looks like me and the elephant are having such fun!

Friday, November 25, 2011

Thanksgiving Wrap-Up

I hope everyone had a lovely day yesterday and hopefully a nice day off today, whether you are fighting the crowds at the mall or snuggling at home and munching on leftovers.  We had a great day yesterday.  I ate way more than I should of and we played a game of Settlers of Catan that took almost as long to explain as to play.  Here's a few photos from the day.

Here are the table settings.  I didn't buy any special fall settings but used my favorite thrifted place mats and honeybee napkin rings.


However, we did have a nice festive mantle.  My fall embroidery piece is still propped up there along with a nice mix of real and fake pumpkins.  Plus the family photos of those far away today.


I didn't actually cook in this, but I did put on my new apron to show off for company.  I found this earlier this week at an antique store and just love it.  It's really more of a "decorative" apron :)


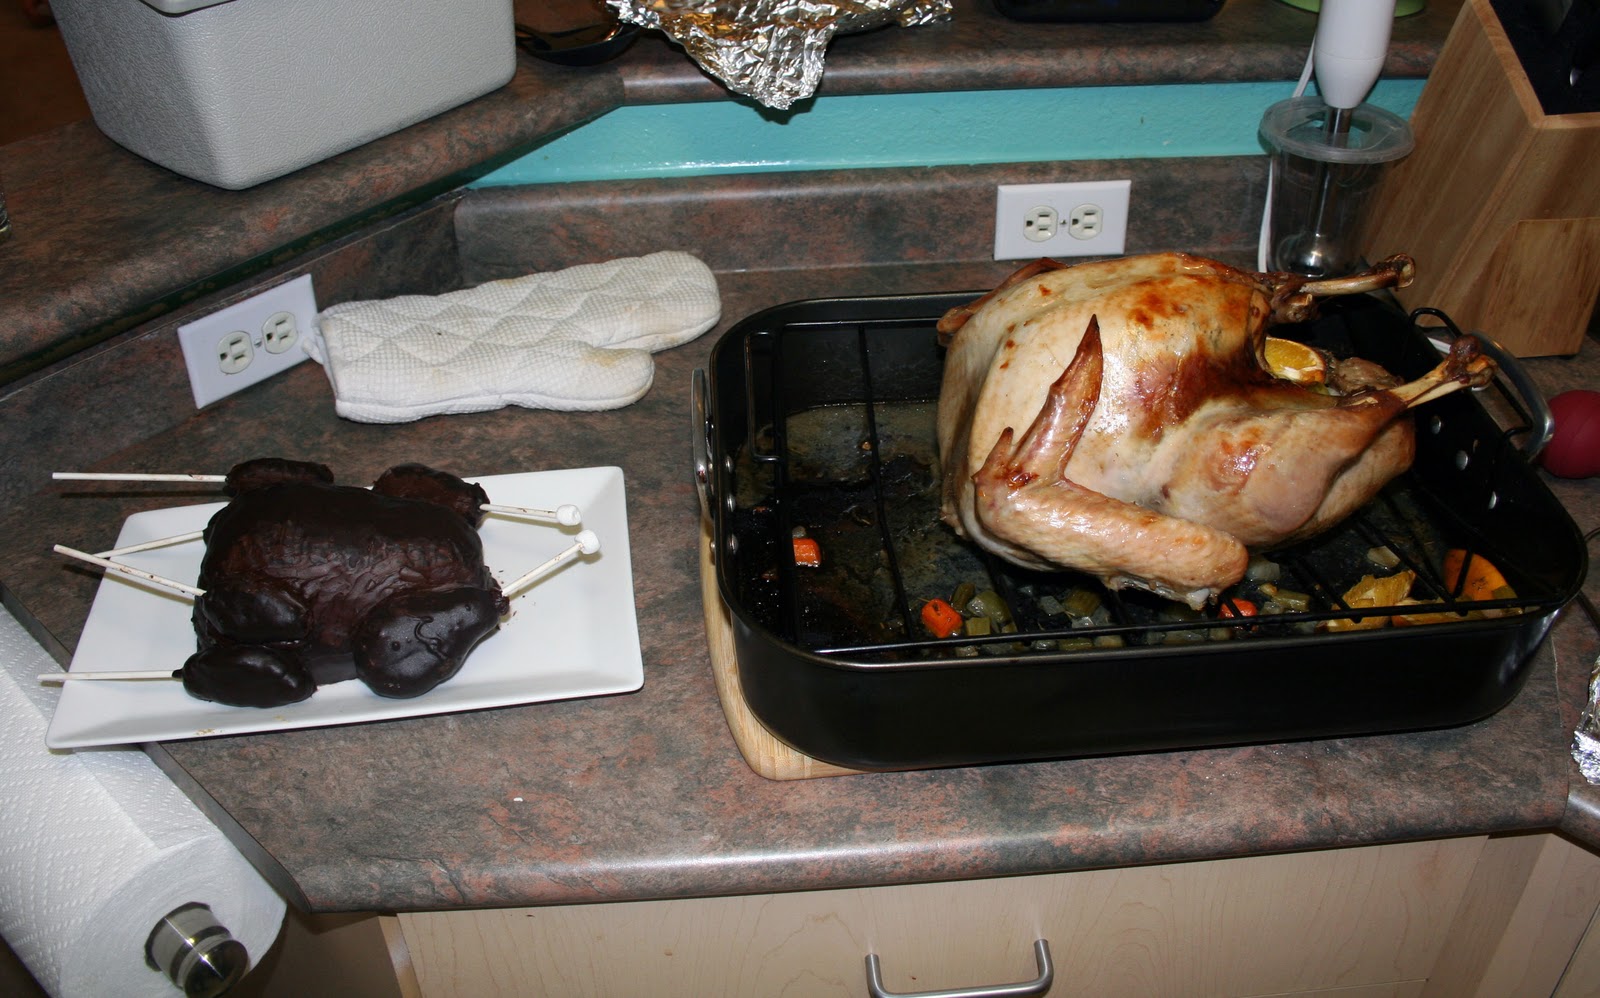
Although both of our turkeys took longer than we expected, I think they both turned out pretty well.


Eugene even carved our cake pop turkey.  I had a chocolate wing and a slice of vanilla.  Yum yum!


On top of our turkey cake, we had plenty of desserts.  Our friends made AMAZING food.


That's it!  I hope you had a great day yesterday.  Don't forget, I will be selling my work in Bellevue, WA today if you want to stop by the show!

Saturday, October 29, 2011

Mom

My mom is coming to visit today!  I'm excited.  She lives in KS so I don't get to see her that often.

Mom Onesie on etsy

Sunday, August 21, 2011

One Year Anniversary

A year ago today I married my best friend.  Here are some pictures to remember the day.  They are all taken by our AMAZING photographers from Red Box Pictures.


Saturday, August 20, 2011

Anniversary Gift

Well as of tomorrow, my hubby and I will have been married for one year!!  Since we are out of town this weekend and I gave him his gift yesterday, I think it's safe to show it off here.


I had seen these photo canvases on display at Ben Franklin Crafts and I thought I would try it.  I took a picture from every month of our marriage and glued it onto a canvas.


At the bottom, I added the phrase "Night and Day, You are the One" because our first dance was to Night and Day.


I'm not sure I "love" the effect, but I think it still captures the message I wanted.

Saturday, August 6, 2011

Freezer Paper Stencil- Smokin' Dreams

While visiting family in KS, I had the fun of helping my brother out with an art project.  He and his friends have a BBQ team called Smokin' Dreams.  They make pretty awesome food and will be cooking at some local events in Kansas City.  The only thing missing, team shirts!  They already had a logo which you can see here on a drink coozy (is there a correct way to spell that?) 


We decided to put the logo on the front corner of the shirt and then add a dreaming pig on the back.  I found a pig image online and then edited it a bit to get the dream bubble and simplify some of the lines.  Then we used this tutorial to do a freezer paper stencil.  It was my first time doing it!


It actually turned out really well.  There are a few smudges which makes me think I may have to be more careful around some of the delicate parts of the stencil.  We're hoping to make a few more so I'm excited. 


Friday, July 29, 2011

Baptism Gifts

I'm flying to KS tomorrow (again!) for my little niece's baptism.  I can't wait to see how much she's grown over the last few months!  And rumor has it, I get to take her swimming. 

I wanted to bring home presents and I actually ended up making presents for her parents (So if you are reading this Mike and Karolien-STOP!).  I guess you normally bring special present for the baby, but she's three months so I think it was okay to focus on the parents as well :)

For my sister-in-law, I created this special little necklace.  I put a picture of my niece between two pieces of glass and soldered around the edges.  I also added a small crystal "diamond" because my niece was born in April and the birthstone for that month is diamond.


For my brother, I kept it simple and just printed out a really cute picture and put it in a thrift store frame.  The frame was originally light wood, but I painted it black.  It's small so I thought that it would be the perfect size for his desk at work.

Wednesday, June 15, 2011

ICC#24-For My Dad

Since father's day is coming this weekend, this week's Iron Craft Challenge was to create something for dad.  I feel safe posting this here because I don't think my dad ever reads my blog.

I had several ideas for this, but tried to limit myself to supplies at home.  One of my goals is to use more supplies that I already own and buy fewer new supplies.  Try to hold me accountable to that blog readers!

In the end, I used some scrabble letters I had from a game we no longer needed (when I got married, we ended up with two scrabble sets).  My dad LOVES scrabble and is quite the competitive fiend about it.  I thought it would be fun to make something useful and thoughtful by creating a personalized scorepad.  I glued the letters onto the bottom of a clip-board we had and tied a pen onto it with ribbon.


Easy and cute!  You could also easily make one and write something like "Score" on it, but I thought this saying was more appropriate for father's day and would give the freedom to use the clipboard for something else if need be.


Want to see more Iron Craft pieces?  Check out the flickr group here.  Want to join in the fun?  Check out the blog here.