Showing posts with label Fall. Show all posts

Friday, October 12, 2012

Fall Food and Craft Roundup

Hey Friends!

Great news!  My cast is off!  I have a walking boot and need to do some physical therapy to get back in perfect shape, but I can actually walk!  I drove myself somewhere for the first time in over six weeks.  Where did I go?  Joanns craft store!  Duh!  Since I'm still working on moving around like a normal human, I don't have any of my own crafts to show you this week.  But here's some neat projects from others that you can check out for inspiration!  Enjoy.

Baked Pumpkin Donut Holes from The Craving Chronicles
Knit Candy Corns from The Purl Bee
Pumpkin Caramel Apples from A Little Tipsy
Apple Pillow from A Beautiful Mess
Pumpkin Chocolate Chip Cookies from Say Yes to Hoboken
Fall Leaves Candle Holders from Martha Stewart

Friday, November 25, 2011

Thanksgiving Wrap-Up

I hope everyone had a lovely day yesterday and hopefully a nice day off today, whether you are fighting the crowds at the mall or snuggling at home and munching on leftovers.  We had a great day yesterday.  I ate way more than I should of and we played a game of Settlers of Catan that took almost as long to explain as to play.  Here's a few photos from the day.

Here are the table settings.  I didn't buy any special fall settings but used my favorite thrifted place mats and honeybee napkin rings.


However, we did have a nice festive mantle.  My fall embroidery piece is still propped up there along with a nice mix of real and fake pumpkins.  Plus the family photos of those far away today.


I didn't actually cook in this, but I did put on my new apron to show off for company.  I found this earlier this week at an antique store and just love it.  It's really more of a "decorative" apron :)


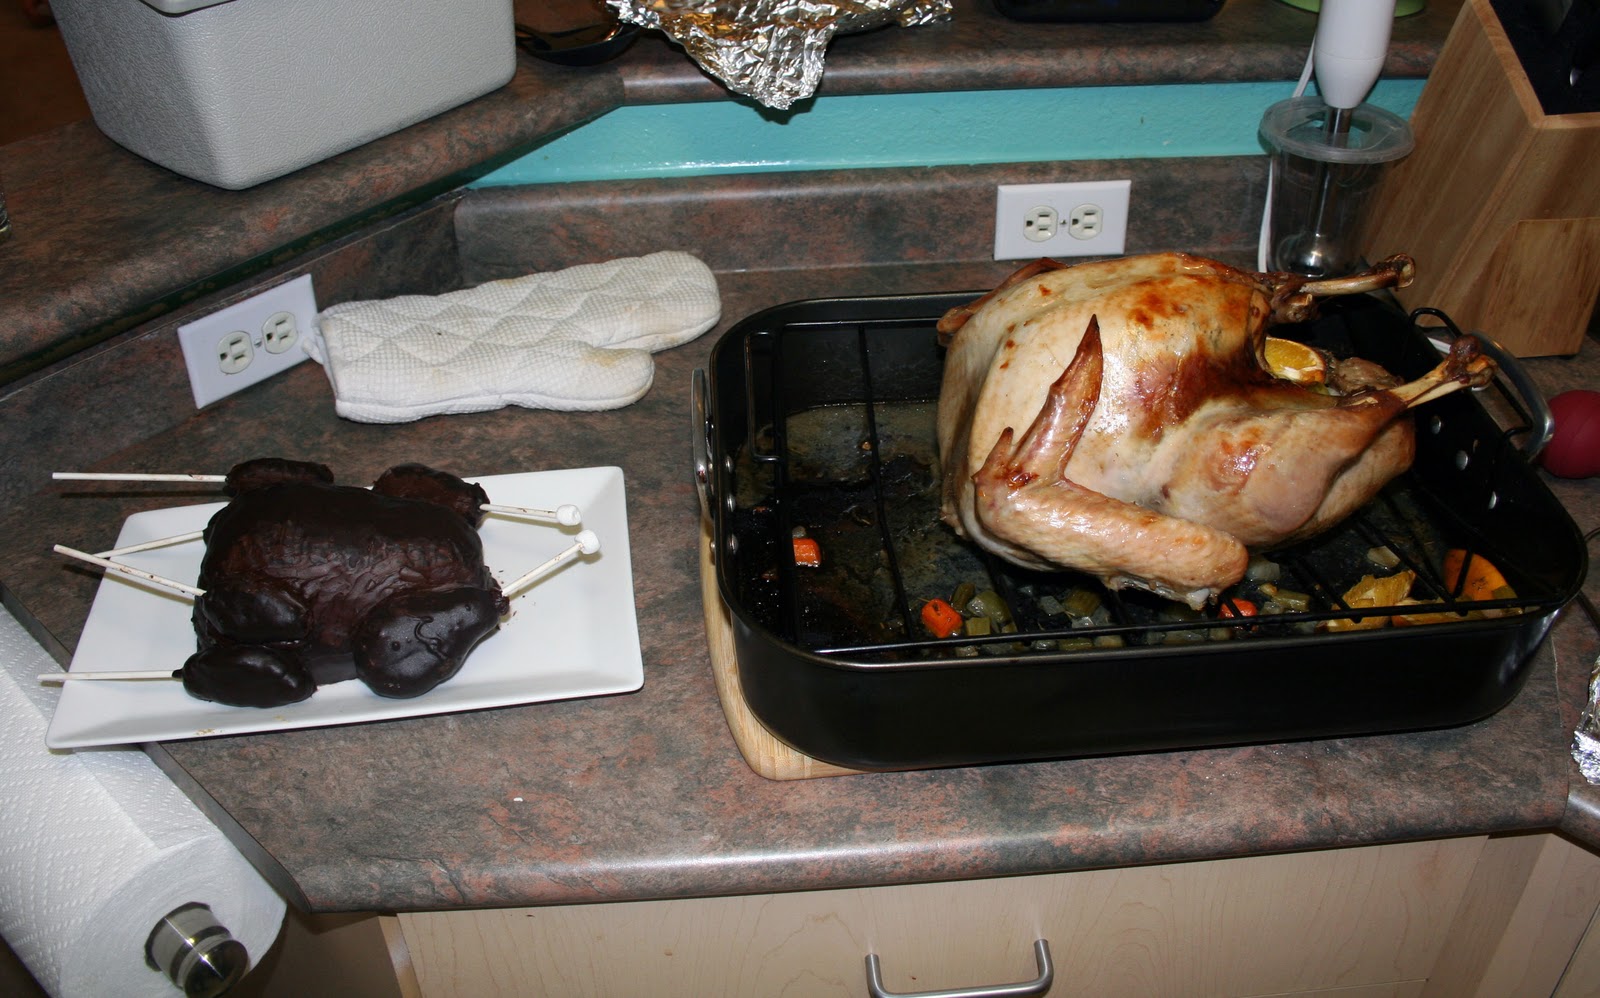
Although both of our turkeys took longer than we expected, I think they both turned out pretty well.


Eugene even carved our cake pop turkey.  I had a chocolate wing and a slice of vanilla.  Yum yum!


On top of our turkey cake, we had plenty of desserts.  Our friends made AMAZING food.


That's it!  I hope you had a great day yesterday.  Don't forget, I will be selling my work in Bellevue, WA today if you want to stop by the show!

Thursday, November 24, 2011

IC#47 Part Two: A Chocolate Turkey

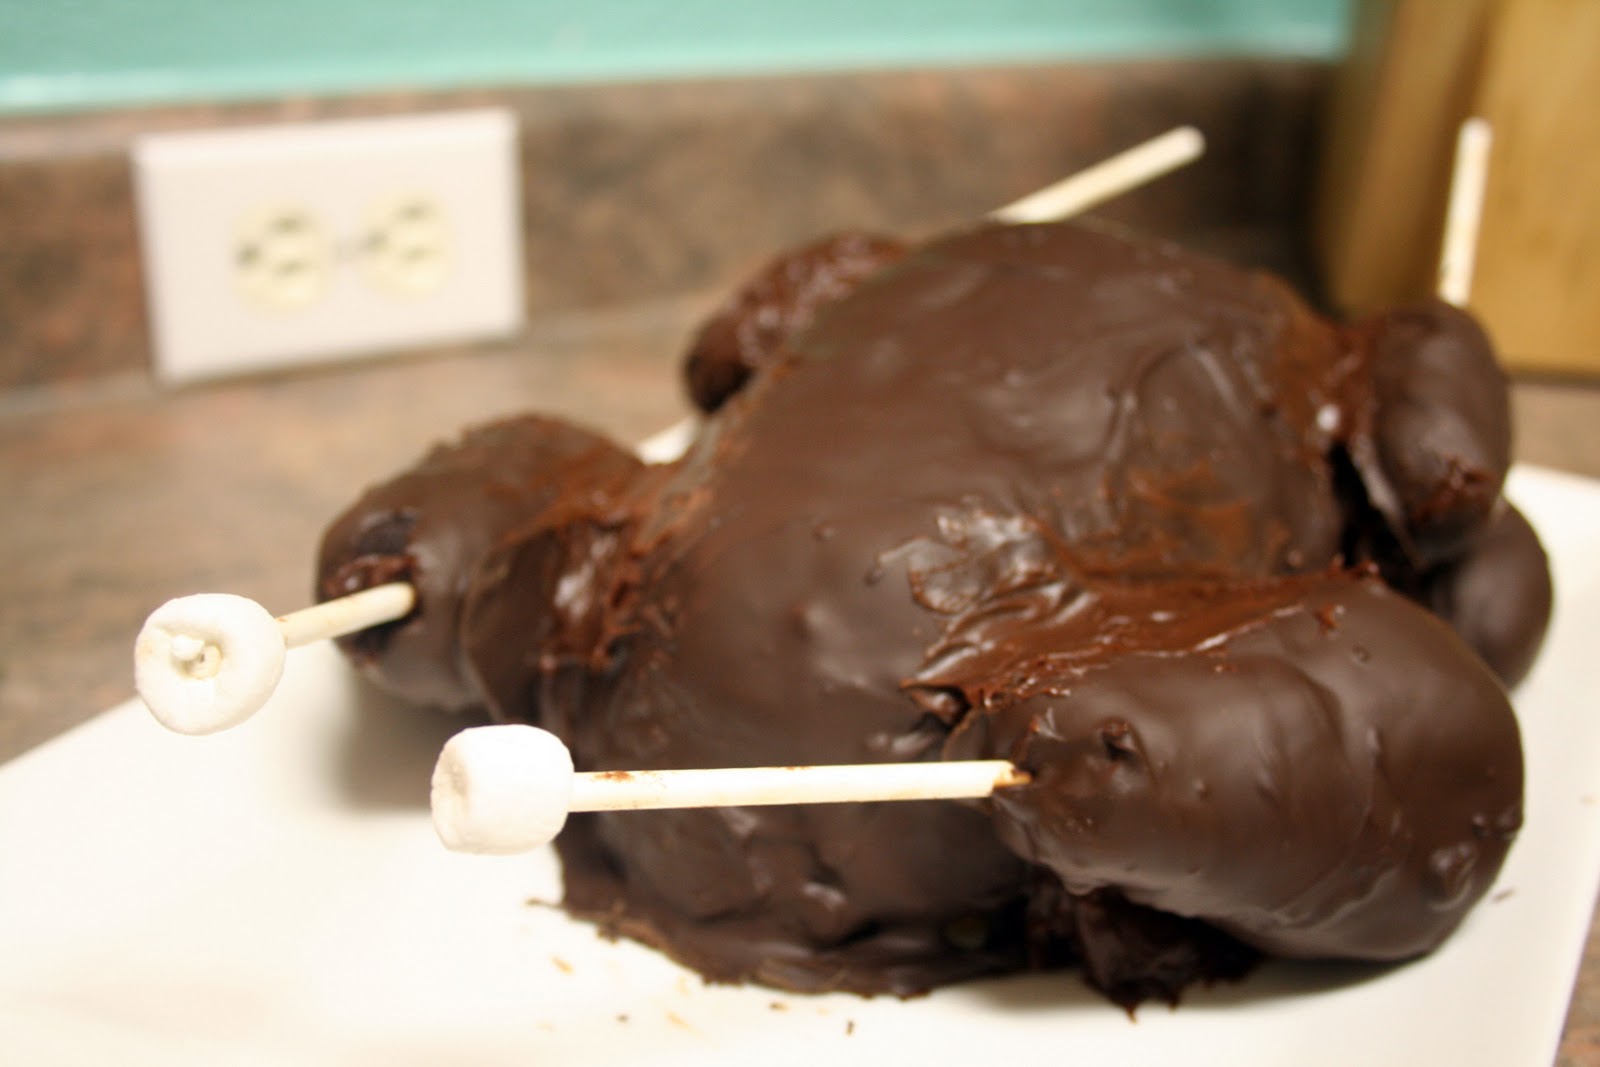
As I mentioned yesterday, my Iron Craft Project was not complete yet.  We worked long into the night, but it is now complete.  I present you with a giant cake pop turkey.


The idea went something like this. "We should make cake pops." "We should make them for Thanksgiving." "Let's make a giant cake pop shaped like a turkey."  Conclusion: my husband and I are weird.

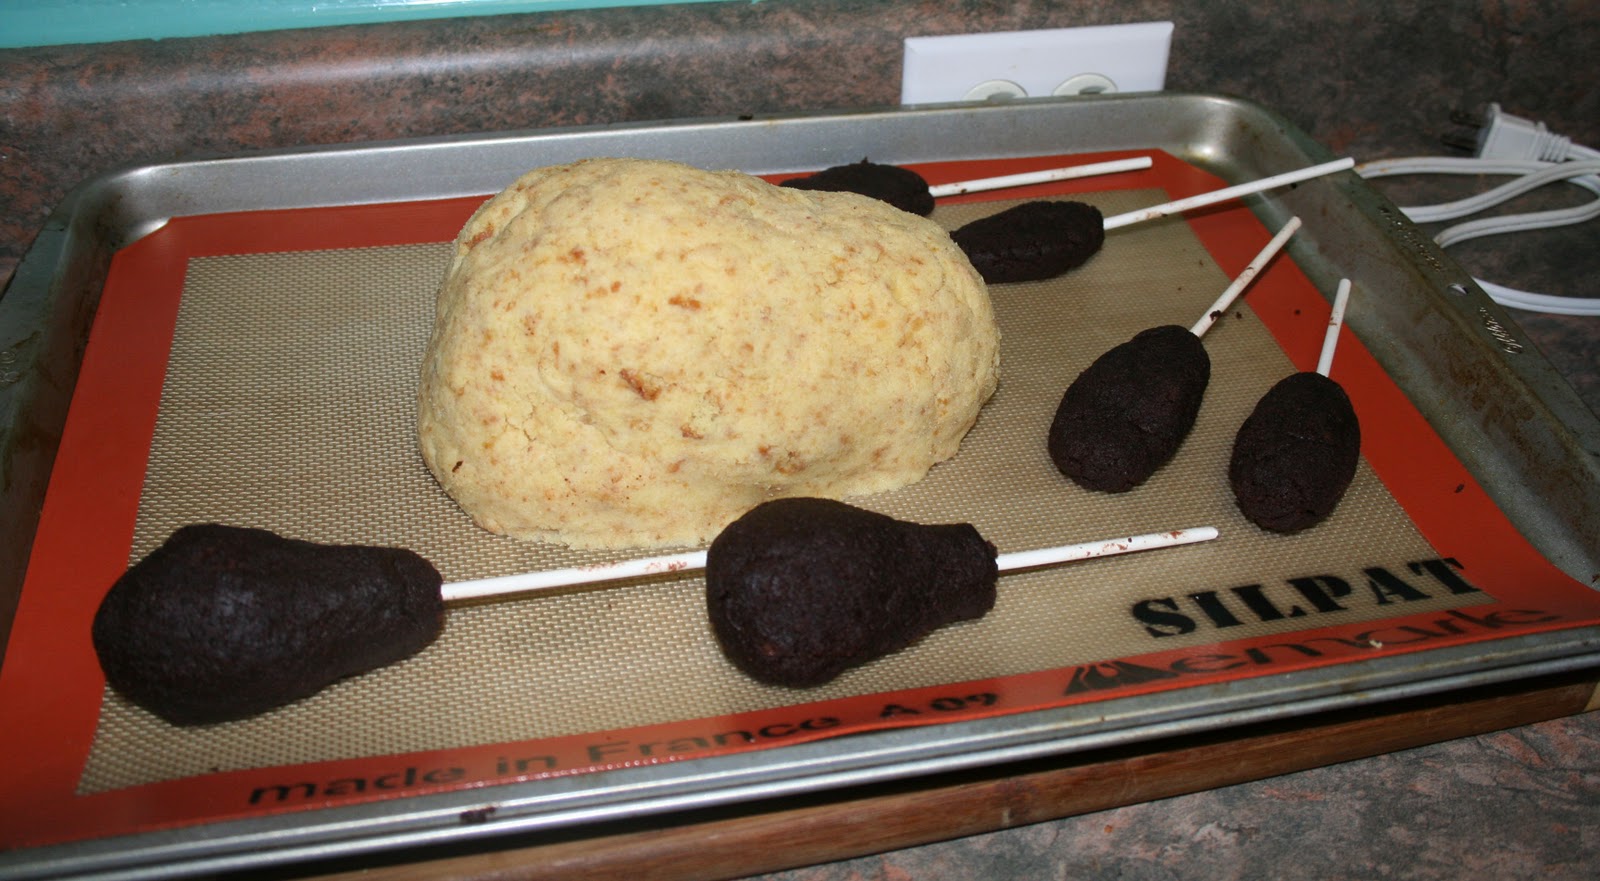
This was our first time making cake pops, but I knew the basic concept.  We started by baking two different cakes, chocolate and vanilla (for dark and light meat).


Next, we dived in and started crumbling the cake up.  I went straight in with my hands.  Once it was crumbled, I added in about 2/3 a can of frosting and worked it into a nice dough.


For the body of the turkey, I just took the entire blob of vanilla and molded it into a turkey shape.  For the drumsticks and wings, I molded smaller shapes and stuck sticks in them.  It was a little weird putting sticks in the wings but it will make it slightly easier to eat.


Now it was time for chocolate.  We used bakers chocolate.  I've heard people mention using those candy melts as well, but I don't have the experience to compare.  For the drumsticks and wings, I was able to dip it in and roll around.  Since the appendages were pretty heavy, I used a spoon to help pour chocolate over and cover it.


For the body, I just poured a bowl of melted chocolate over the top and used a spoon to help spread it around.  Be sure to do this on a non-stick surface and not your final serving platter.  The chocolate really pools at the bottom so later you will trim the excess and move it.


Once the chocolate has set (the fridge really speeds this up), you are ready to assemble your turkey.  To move the body, find a partner.  My husband lifter the entire silpat we were using and slowly peeled one edge down.  I then put a spatula under that end and we slowly moved it onto the plate. We were out of chocolate so I used frosting to attach the limbs.  Just blob a bunch on there and press the pieces on.  I recommend using a utensil to push them on because your fingers will melt into the chocolate.


To finish, we cleaned up the edges where the frosting was and added little marshmallows to the ends of the drumsticks.  Done!


Wednesday, November 9, 2011

IC45- A Fall Project

This week is the Iron Craft Fall Challenge (cue intense music).  When I think of fall, I think of leaves.  So for my project, I created a tree with fabric leaves, perfect to hang on the wall.


I sketched out the tree and pinned the fabric leaves in place.  Then I stitched over the tree with my machine and added the words "Give Thanks" by hand.  I left the leaves loose on the edges so they will flutter a bit and look more realistic.  I put the finished piece in an embroidery hoop to display it.


Want to see more Iron Craft pieces?  Check out the flickr group here.  Want to join in the fun?  Check out the blog here.

Friday, October 28, 2011

Apple Cider

We had a party the other night and I made apple cider using this recipe from Real Simple.  I love Real Simple and I love apple cider.  Win-win.

Image from Real Simple-Mine didn't look quite so nice :)

Sunday, October 23, 2011

Mini Pumpkin Decorating

Last night we had friends over for a potluck and mini pumpkin decorating party.  I just love those mini pumpkins.  I was a little uncertain whether anyone would actually want to decorate a pumpkin; crafty activities can be hit or miss.  But it turned out to be pretty fun and many of our friends went home with a cute little pumpkin.  Here are some picture from the night:


We used paint pens which worked really well.  We also tried sharpies but they didn't show up well and then stopped working.  I also used some wire, toothpicks and card stock to make extra accessories.


Friday, October 7, 2011

Pumpkin Cake

This week it was our turn to bring snacks to bible study.  I decided to take a simple route and try out this recipe for pumpkin cake.  I already had a box of cake mix and some canned pumpkin.  I had used a little of both for other things, but I decided to go with it anyway.


On the top, I created a pumpkin stencil and dusted it with powdered sugar and cocoa.  At first, I made a parchment paper stencil and was going to just use powdered sugar.  But this stencil proved too flimsy and the edges turned up mid-sprinkle.  After consulting my husband for advice, I ended up covering the whole thing with powdered sugar, cutting a new stencil out of cardboard, and then dusting with cocoa powder.  Much better.


The cake was delicious.  Moist and tasty.  It was all gone by the end of the night so I think it was a big hit.