Babies are cute. Babies in headbands, super cute. Babies in feathery headbands, I can barely even talk about it. Here's a quick project to jazz up the heads of any babies in your life.
Start with some elastic (I chose ruffle elastic), feathers, and felt. Measure your babies head and cut that much elastic. My two-month old has about a 16" head if that helps.
Now start on your jazzy accent. I created mine by hot-gluing feathers to felt. I started with a heart shape but wasn't happy with it. I then switched to felt circles.
This wasn't quite enough so I added a button. I then added a circle of hot glue and covered it with glitter. I had no idea if this would work but it created a cool dimensional effect.
Finally, I sewed my felt piece onto the two ends of elastic, securing them together. The last step is to find a cute baby to model it. Probably it will fall off as soon as you set your baby down and she starts wiggling, but cute while it lasts.
Showing posts with label Crafting Process. Show all posts
Tuesday, April 2, 2013
Monday, December 3, 2012
Oilcloth Diaper Bag- A lesson in trying again
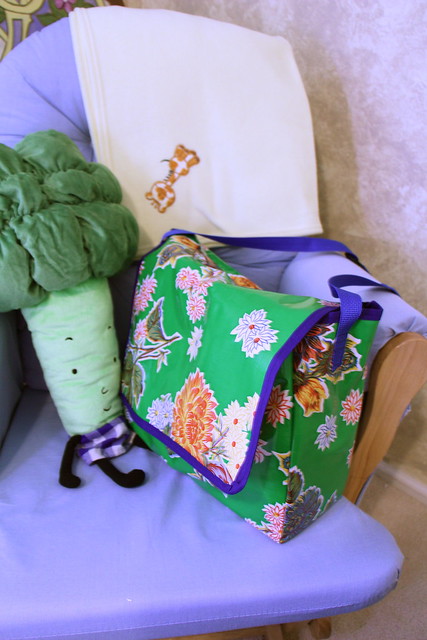
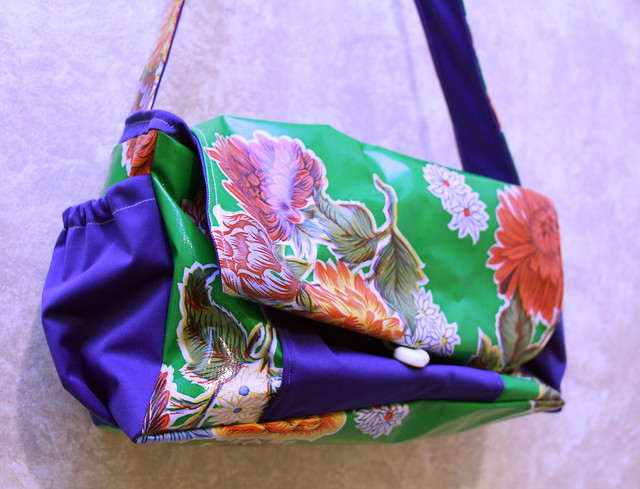
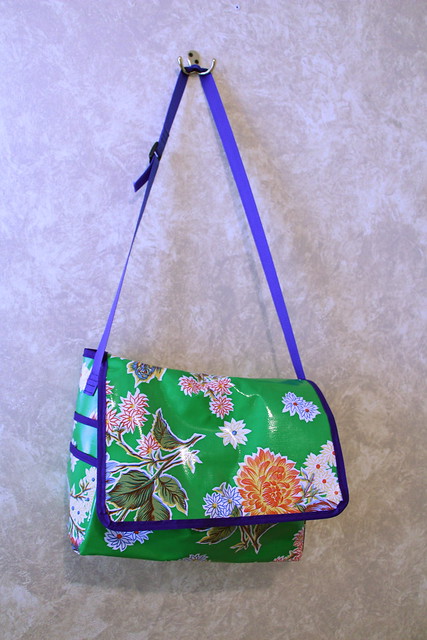
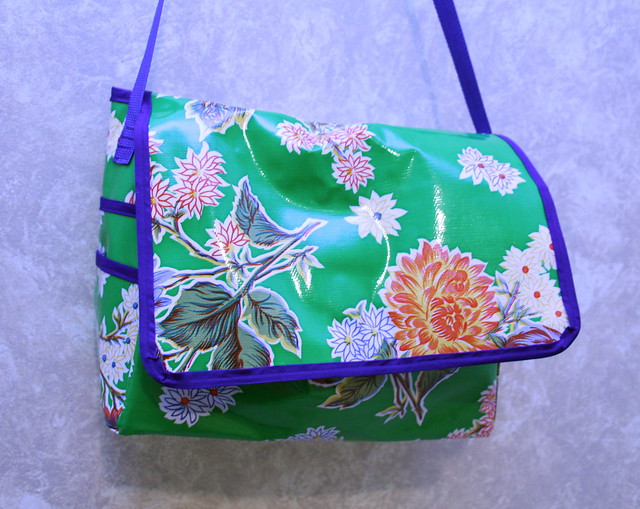
I recently finished making my own diaper bag. I had wanted one in green oilcloth and just couldn't find one for sale. Since I'm pretty crafty, I thought I'd make my own :) I'm THRILLED with the final product.
However, I definitely did not start out thrilled. Here is my attempt number one:
I used a pattern that I bought online for this first one. My sewing skills were not quite up to the challenge. I had a really hard time putting it together. In addition, I used PUL fabric for the interior lining and it was sooooo slippery. The contrasting thread that I thought would be cute ended up showing all my mistakes.
When I finished this first bag, I was so upset. Pregnancy hormones were not a help in this. I felt like I had wasted so much money and time and would never be able to have a diaper bag I liked. I was "in the depths of despair." But time and sleep helped and I decided to try again.
This second time around, I used a pattern for a messenger bag from the book Sewing With Oilcloth. I nixed the PUL fabric and used blue thread rather than white. This helped hide all my crooked stitches. I also used store-bought bias tape rather than trying to make my own. Overall, this pattern was much easier for my current sewing skills and I found it easier to work with just oilcloth.
I wanted to share my craft fail to show that a project is always worth a second try. Sometimes you just have to change it up a bit or try a different approach. Have you ever had an experience like this?
Don't forget to enter my giveaway to win some awesome digital scrapbooking software.
However, I definitely did not start out thrilled. Here is my attempt number one:
I used a pattern that I bought online for this first one. My sewing skills were not quite up to the challenge. I had a really hard time putting it together. In addition, I used PUL fabric for the interior lining and it was sooooo slippery. The contrasting thread that I thought would be cute ended up showing all my mistakes.
When I finished this first bag, I was so upset. Pregnancy hormones were not a help in this. I felt like I had wasted so much money and time and would never be able to have a diaper bag I liked. I was "in the depths of despair." But time and sleep helped and I decided to try again.
This second time around, I used a pattern for a messenger bag from the book Sewing With Oilcloth. I nixed the PUL fabric and used blue thread rather than white. This helped hide all my crooked stitches. I also used store-bought bias tape rather than trying to make my own. Overall, this pattern was much easier for my current sewing skills and I found it easier to work with just oilcloth.
I wanted to share my craft fail to show that a project is always worth a second try. Sometimes you just have to change it up a bit or try a different approach. Have you ever had an experience like this?
Don't forget to enter my giveaway to win some awesome digital scrapbooking software.
Labels:
Baby,
Crafting Process,
Sewing
Wednesday, September 26, 2012
Planet Paper Lanterns: A Partial Tutorial
Hello All! Have you noticed a steady decline in the amount I'm posting? The broken ankle is really keeping me from a lot of creative endeavors. It's annoying but only a week and a half more with my cast on. Yay! I'm ready because it's getting really frustrating being stuck at home on the couch.
HOWEVER, I do have a project to share today (yayayayayayaya). I'm working on a project for my church for our kids Halloween party. The theme this year is outer space so I'm helping to make some planet decorations. Let me show you what I'm doing so far!
Planet number 1: Swirly Green Awesomeness
Start with a plain paper lantern. Mine was light green so I am going to be accenting it with dark green.
Lay it flat. Use watercolor paint to draw swirls all around the lantern (I used blue and green). By doing this on the flattened lantern, you will end up with circular accents when you open it up. Do this to both sides.
Now open it up. See your swirls? Next, we're going to accent it with tissue paper. Rip up lots of irregular pieces of tissue paper. The raggedier the better.
Use Mod Podge to adhere the tissue paper all around the lantern. I kept these closer to the middle to give it some visual interest. I also crumpled the tissue paper a little before attaching it to give it dimension.
Finally, I mixed up a little glitter glue by combining Mod Podge with loose glitter. I used a small paint brush to add even more streaks across the planet. That's it! I can't wait to see it hung up in action.
Planet number 2: Dark Blue Giant -I am missing the proper inner wire for this one, so you will have to wait in suspense to see it all opened up :)
This lantern was dark blue so I used a different technique to decorate it. Once again, I started by decorating it flat. This time, I used a mix of acrylic paint to sponge on texture. The acrylic showed up better on the dark paper. I used a mix of white, black, and blue. When you open it up, it gets the same rings of texture like in the green one.
To accent it, I also made a ring of stars to go around it. I made a garland of silver stars that is the same circumference as the lantern. When the lantern is opened, the garland will stay in place and can be adjusted to the position you want.
Once I get the appropriate hanger, I'll show this guy all opened up. You'll just have to wait in suspense until then...
HOWEVER, I do have a project to share today (yayayayayayaya). I'm working on a project for my church for our kids Halloween party. The theme this year is outer space so I'm helping to make some planet decorations. Let me show you what I'm doing so far!
Planet number 1: Swirly Green Awesomeness
Start with a plain paper lantern. Mine was light green so I am going to be accenting it with dark green.
Lay it flat. Use watercolor paint to draw swirls all around the lantern (I used blue and green). By doing this on the flattened lantern, you will end up with circular accents when you open it up. Do this to both sides.
Now open it up. See your swirls? Next, we're going to accent it with tissue paper. Rip up lots of irregular pieces of tissue paper. The raggedier the better.
Use Mod Podge to adhere the tissue paper all around the lantern. I kept these closer to the middle to give it some visual interest. I also crumpled the tissue paper a little before attaching it to give it dimension.
Finally, I mixed up a little glitter glue by combining Mod Podge with loose glitter. I used a small paint brush to add even more streaks across the planet. That's it! I can't wait to see it hung up in action.
Planet number 2: Dark Blue Giant -I am missing the proper inner wire for this one, so you will have to wait in suspense to see it all opened up :)
This lantern was dark blue so I used a different technique to decorate it. Once again, I started by decorating it flat. This time, I used a mix of acrylic paint to sponge on texture. The acrylic showed up better on the dark paper. I used a mix of white, black, and blue. When you open it up, it gets the same rings of texture like in the green one.
To accent it, I also made a ring of stars to go around it. I made a garland of silver stars that is the same circumference as the lantern. When the lantern is opened, the garland will stay in place and can be adjusted to the position you want.
Once I get the appropriate hanger, I'll show this guy all opened up. You'll just have to wait in suspense until then...
Labels:
Crafting Process,
Tutorial
Thursday, June 21, 2012
Dalek Tote Bag- Exterminate!!
I found these plain white tote bags at Target the other day for only $2. This seemed like the perfect way to play with my Sharpie Stained markers. What did I decide to create? A Doctor Who themed bag of course!
I started by drawing out a Dalek on a blank sheet of paper. I free-handed it, but you could easily print out an image from online.
Next, I transferred my image to the bag. I did this by coloring the back of my drawing with pencil and then laying the drawing on the bag. Next I traced over my image. This transferred the pencil to the bag.
Finally, I traced the pencil drawing with my sharpies. I added the word "Exterminate" to the side.
That's it! Don't you love the way I didn't iron my bag before I started working on it? I'm so classy.
I started by drawing out a Dalek on a blank sheet of paper. I free-handed it, but you could easily print out an image from online.
Next, I transferred my image to the bag. I did this by coloring the back of my drawing with pencil and then laying the drawing on the bag. Next I traced over my image. This transferred the pencil to the bag.
Finally, I traced the pencil drawing with my sharpies. I added the word "Exterminate" to the side.
That's it! Don't you love the way I didn't iron my bag before I started working on it? I'm so classy.
Labels:
Accessories,
Crafting Process,
Tutorial
Saturday, May 12, 2012
Craft Fail: TARDIS Lantern
I really debated posting this project since I really don't like how it turned out. BUT, I know everyone has craft fails so I thought it would be encouraging to show one of mine. See, even people who are normally pretty crafty make mistakes.
A couple of weeks ago I saw this plain lantern on sale at Ben Franklin Crafts. Immediately, I thought TARDIS (from Doctor Who- really, you still haven't watched it? j/k, you're cool). I seriously worked on it for weeks. Only a few minutes at a time, but still.
This is the result. I am not pleased. It just really looks messy and does not match my vision. I attribute it to the fact that I kept ignoring little mistakes thinking, "hmm, it will probably look alright and TARDIS-y when I get it all together." These things kept piling up until I had a big mess of not-looking-right.
BUT, I am not defeated. I still want to create my vision. I will find another lantern and try again.
A couple of weeks ago I saw this plain lantern on sale at Ben Franklin Crafts. Immediately, I thought TARDIS (from Doctor Who- really, you still haven't watched it? j/k, you're cool). I seriously worked on it for weeks. Only a few minutes at a time, but still.
This is the result. I am not pleased. It just really looks messy and does not match my vision. I attribute it to the fact that I kept ignoring little mistakes thinking, "hmm, it will probably look alright and TARDIS-y when I get it all together." These things kept piling up until I had a big mess of not-looking-right.
BUT, I am not defeated. I still want to create my vision. I will find another lantern and try again.
Labels:
Crafting Process,
Fail
Friday, May 4, 2012
Artistic Copying and Inspiration
I wanted to write a more serious post today and get your thoughts on something I have been thinking about lately. In the creative world, there is a lot of talk about artistic originality. If an artist claims that a big company has stolen their idea, the creative community goes up in arms. Post after post will be written about the evil corporation that stole a poor etsy seller's idea (example 1, 2, 3). I completely agree that you shouldn't have your ideas ripped off by someone else. But my question today is, why isn't the reverse true?
I started thinking about this last week when I watched a video post on how to recreate a dress from Mod Cloth. I don't want to give any specifics on the blog I saw this on. This isn't a post to call out specific bloggers or make anyone feel bad. Really, I just wanted to open up the discussion on when it is okay to copy. I'm sure if you spend time reading blogs, you have seen someone give a tutorial on creating a Anthropologie knock-off or a Kate Spade replica purse. I'm not talking about the ones where you recreate a current trend. I'm talking about the tutorials on how to create an exact copy of the store item. These seem to be quite common and accepted in the craft community. I myself have seen designer pieces and thought to myself, "I could make that so much cheaper."
However, there seems to be a distinction made between large companies and independent designers. If I posted a tutorial showing how to create something from an etsy seller and linked directly to the etsy design, I would probably get some angry comments. I've even read blog posts on how wrong it is to pin an etsy product on pinterest under a board labeled DIY (example 1, 2).
So what's the distinction? Why is it okay to share these tutorials online? Is it okay because we aren't selling them? Even if a product is sold by a large store like Anthropologie or Urban Outfitters, didn't someone have to design it in the first place? Is it considered okay because they are already so successful?
I would love to hear your thoughts on this. I'm honestly not sure what the answer to all of this is and would love to hear some other insights into it. I try to be careful about what I post myself, but I do read blogs with these kinds of posts and have even pinned the projects, so I'm wondering, should I stop?
![]() |
| Image Source |
I started thinking about this last week when I watched a video post on how to recreate a dress from Mod Cloth. I don't want to give any specifics on the blog I saw this on. This isn't a post to call out specific bloggers or make anyone feel bad. Really, I just wanted to open up the discussion on when it is okay to copy. I'm sure if you spend time reading blogs, you have seen someone give a tutorial on creating a Anthropologie knock-off or a Kate Spade replica purse. I'm not talking about the ones where you recreate a current trend. I'm talking about the tutorials on how to create an exact copy of the store item. These seem to be quite common and accepted in the craft community. I myself have seen designer pieces and thought to myself, "I could make that so much cheaper."
![]() |
| Scarf from Anthropologie. Image Editing by me. |
However, there seems to be a distinction made between large companies and independent designers. If I posted a tutorial showing how to create something from an etsy seller and linked directly to the etsy design, I would probably get some angry comments. I've even read blog posts on how wrong it is to pin an etsy product on pinterest under a board labeled DIY (example 1, 2).
![]() |
| Image Source |
So what's the distinction? Why is it okay to share these tutorials online? Is it okay because we aren't selling them? Even if a product is sold by a large store like Anthropologie or Urban Outfitters, didn't someone have to design it in the first place? Is it considered okay because they are already so successful?
![]() |
| Image Source |
I would love to hear your thoughts on this. I'm honestly not sure what the answer to all of this is and would love to hear some other insights into it. I try to be careful about what I post myself, but I do read blogs with these kinds of posts and have even pinned the projects, so I'm wondering, should I stop?
Labels:
Crafting Process,
Inspiration
Tuesday, April 24, 2012
IC#8- Recycled Hummingbird Feeder
We were challenged this week to create something using recycled materials. I had been wanting to put a hummingbird feeder out on my porch so I decided to try and make one.
I started with a small plastic container that held hair gel. In addition, I used a tall glass bottle and a coke can. I washed everything and removed what labels I could.
Next, I drilled a hole in the middle of each of the two lids. This will allow your nectar solution to run between the two containers.
In addition, I drilled several holes around the edge of the hair container. This will be where the hummingbirds can access the nectar.
Next, I glued the two lids together, making sure the two holes lined up. I used E6000 to glue them together.
Next, I added a wire cage to the glass bottle which would allow me to hang it up.
Finally, I made some red flowers to decorate it with. I punched out some hearts from the coke can and then started gluing them on the bottle to form flowers.
As of writing this, I'm still waiting for the glue to completely set so I haven't put it up yet. I'll keep you posted on whether it functions and attracts hummingbirds.
Want to see more Iron Craft pieces? Check out the flickr group here. Want to join in the fun? Check out the blog here.
I started with a small plastic container that held hair gel. In addition, I used a tall glass bottle and a coke can. I washed everything and removed what labels I could.
Next, I drilled a hole in the middle of each of the two lids. This will allow your nectar solution to run between the two containers.
In addition, I drilled several holes around the edge of the hair container. This will be where the hummingbirds can access the nectar.
Next, I glued the two lids together, making sure the two holes lined up. I used E6000 to glue them together.
Next, I added a wire cage to the glass bottle which would allow me to hang it up.
Finally, I made some red flowers to decorate it with. I punched out some hearts from the coke can and then started gluing them on the bottle to form flowers.
As of writing this, I'm still waiting for the glue to completely set so I haven't put it up yet. I'll keep you posted on whether it functions and attracts hummingbirds.
Want to see more Iron Craft pieces? Check out the flickr group here. Want to join in the fun? Check out the blog here.
Labels:
Crafting Process,
Iron Craft Challenge,
Tutorial
Friday, April 20, 2012
Color-Block Leather Bracelet
I found a leather bracelet on sale at Michael's the other day and decided it was a perfect time to try out the whole color-blocking trend. Here's what I did.
I started with the plain bracelet. If you were fancy, you could cut out your own bracelet. But this one was super cheap so why not? I started by removing the hardware.
Then I decided which section to paint and blocked off the rest with painter's tape.
Then I added a few coats of pink paint. I had been wanting to try out the new Martha Stewart paint so I bought some for this project. It went on great and seems to hold up well.
Once it had dried a bit, I pulled off the tape and then let it dry a little longer.
Finally I reattached the hardware. DONE! I'm excited to wear it on my trip to CA next week. Did I tell you I'm going to CA next week? We're renting a house with my husband's family. Disneyland is in the plan. Get excited.
I started with the plain bracelet. If you were fancy, you could cut out your own bracelet. But this one was super cheap so why not? I started by removing the hardware.
Then I decided which section to paint and blocked off the rest with painter's tape.
Then I added a few coats of pink paint. I had been wanting to try out the new Martha Stewart paint so I bought some for this project. It went on great and seems to hold up well.
Once it had dried a bit, I pulled off the tape and then let it dry a little longer.
Finally I reattached the hardware. DONE! I'm excited to wear it on my trip to CA next week. Did I tell you I'm going to CA next week? We're renting a house with my husband's family. Disneyland is in the plan. Get excited.
Labels:
Crafting Process,
Jewelry,
Tutorial
Thursday, April 19, 2012
Easter Card...Only a Few Weeks Late
I meant to share this card closer to Easter, but will go ahead and share it now. It's generic enough that you could make it any time of year...for someone who really likes bunnies :)
It was really easy. I started by stamping the front with the phrase "some bunny loves you."
Since the card was for my husband, inside I added a picture of us along with the phrase "it's me."
Now for the real cutesy touch, I gave myself paper bunny ears. I just held the paper up to the picture and marked the size of my head, then cut from there.
That's it! Feel free to pin this project for next Easter...or your bunny-loving best friend :)
It was really easy. I started by stamping the front with the phrase "some bunny loves you."
Since the card was for my husband, inside I added a picture of us along with the phrase "it's me."
Now for the real cutesy touch, I gave myself paper bunny ears. I just held the paper up to the picture and marked the size of my head, then cut from there.
That's it! Feel free to pin this project for next Easter...or your bunny-loving best friend :)
Labels:
Crafting Process,
Easter,
Tutorial
Subscribe to:
Posts (Atom)