Showing posts with label Fabric. Show all posts

Thursday, August 29, 2013

DIY Baby Photo Album Soft Book

Hello friends!  I have a project to share today that I am really excited about.  I've been planning it for months and finally got around to making it.  It's a photo album for my daughter!  All of our family lives far away and I wanted to help her learn who everyone is (eventually).  She also really loves the soft fabric books.  Family+Fabric Book= Family photo album soft book!


I used Spoonflower to create my fabric.  If you don't know Spoonflower, you should check out their site.  You can get custom-printed fabric.  I wanted to go this route rather than printable iron-ons because I was worried about bits flaking off as she chewed on it.

I created the fabric design in photoshop and scaled it to fit a fat quarter (18"x 21").  If you need more info on how to do this, see this post.  You can also just look at the picture below to see how everything was laid out.  I planned it so the pages going across could fold in half (you'll see what I mean further down.)

I smudged out the cousins names in case their parents don't want that on the internet.  They actually have names in the book :)  And in case you are wondering, Halmoni and Haraboji are grandma and grandpa in Korean.

Once I ordered my fabric, I checked the mail excitedly for awhile until it came.  Yay!  Then I got to work.


I started by cutting my images into three strips.  I trimmed right to the edge along the top and bottom but left the side edges as they were.


Next, I folded each page in half with the right-sides together.  I ironed the fold to hold it in place and then serged the other edge.  NOTE: Be careful about this.  I wasn't thinking about where my stitches were going to end up and I sewed too far in.  It didn't really hurt the project, but when I turned it inside out, the pages on that side were slightly smaller than the other side.


Next, I cut out pieces of fusible fleece that were slightly smaller than the pages.  By leaving a gap in the middle of each page spread, I was hoping to reduce bulk at the spine and make the pages easier to turn.  I ironed these onto the wrong sides of the pages.


I then sewed the top and bottom of the pages using my normal sewing machine and leaving a small gap along one side.  I then turned the pages inside out and sewed along the entire outer edge.


Finally, I stacked the pages and sewed several times through the middle to hold it all in place.


It's done!  I was really excited to make this so I worked through it really quickly.  If I make another, I think it might be fun to add little ribbon "tabs" to each page.


I'm pretty sure my girl is a fan.  She started screeching really loudly when she looked at it.  Excitement?


Thursday, March 29, 2012

Fabric Stamping Tutorial

As promised, here is a tutorial for creating and using your own fabric stamp.  Don't forget, you can win on of these bags by entering the giveaway I posted yesterday!


Start with an eraser.  I found a three pack at the dollar store.  I chose to cut the stamp in half since I was making a smaller stamp.


Sketch out your design with a pencil.  I traced an owl charm on mine.  I kept it fairly basic so that it would be easy to carve.


Using whatever knife or carving tools you have, start cutting away at the eraser.  I found it easy to slice down around the design and then into the side of the eraser.


Continue working until you have cut out the whole design.  Now start stamping!  Do a few practice ones on paper to start.  I chose to stamp on some fabric bags I had on hand but it was challenging to stamp on the uneven surface.


You can leave it like that or do what I did next and trace around your design.  I wanted to add details and let the whole piece pop a bit more.


I created these pieces in red and turquoise as part of a Blogging Business Artisans challenge.  Each month, we are challenged to create something along a theme and this month was based on the colors red and turquoise.  See more challenge pieces here.

Wednesday, March 28, 2012

Birthday Giveaway!!!

Big news!  It's my birthday today.  I'm going to celebrate by getting my hair cut and a cup of coffee.  Maybe a stop in a thrift store.  Man, do I know how to party.

BUT, the big news for you is that I am hosting a giveaway.  To give a gift to you!  I recently made some small fabric bags using an owl stamp (tutorial coming tomorrow) and decided I didn't need two new bags.  So I am going to give one away! 


*****GIVEAWAY CLOSED*****

TO ENTER:  
Leave a comment on this post telling me which bag you would like, the red or the tan. 

BONUS ENTRIES (LEAVE AN ADDITIONAL COMMENT FOR EACH):
1. Like A Bird In The Hand Art on Facebook
2. Follow A Bird In The Hand Art on Twitter
3. Spread the word!  Post about this giveaway anywhere on the web.
4. Make up a poem and post it here.  This is just because I like silly poems.

Contest closes on Tuesday April 10 at noon.  I will announce the winner here on April 11.  If you don't regularly check this blog, make sure you leave an email address so I can get in touch with you.

Tuesday, February 14, 2012

IC#3- Fleece Ear Warmer

Our Iron Craft Challenge this week was on the theme "Warm Up."  I had the perfect project.  I had been wanting to make a cute fleece ear warmer for awhile and just found some bright blue fleece in the remnant bin at Joann's.  And bonus, it was 50% off.  Rock on.


I started by trying to make a fancy sewn one.  This failed and I started to experiment.  I came up with this simple number.  It's no-sew and has a fun little bow on top :)  I drew out a pattern and will post it on here later this week.  I'm working on making matching wrist warmers so I will try to put them up together.

Want to see more Iron Craft pieces?  Check out the flickr group here.  Want to join in the fun?  Check out the blog here.

Tuesday, January 24, 2012

New Vintage Handkerchief Pieces

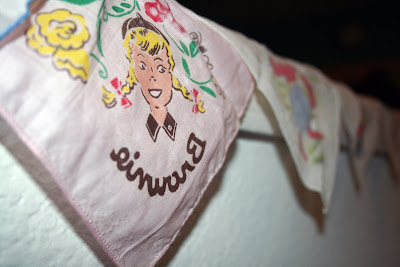
I've been working on some new pieces using another vintage handkerchief.  I realized I should start getting shots of the handkerchief before I cut it up, but you can get the idea of the starting point from this picture.


I started by making another bird.  This one is kind of a fancy bluejay.  I haven't named her yet.  What do you think, does she look like a Lucy?


I'm also using some pieces to create some wooden pendants.  These will be hung from long chains with beaded accents. 


I'm hoping to get all these pieces finished and in the shop soon.  Currently I have one of my previous handkerchief birds in the shop and you can see it here.

Saturday, January 14, 2012

New Rings In Progress

I'm working on some new rings for Valentine's day and I wanted to show off some in progress photos.  I'm using wooden hearts and covering them with fabric like normal, but this time I added some details.


I started by outlining one in black and it grew from there.  I love the bold, graphic look of it and I think it helps to define the heart.


One thing I'm trying to decide though is should I keep the natural wood on the edge/bottom or paint the whole thing (black or other matching color)?  What do you think?

Thursday, December 8, 2011

New Birdies in Progress

I'm finally putting my vintage handkerchiefs to use.


Wednesday, December 7, 2011

ICC#49- Fabric Blocks

Our challenge this week was to create something for the kids.  I decided to make a gift for my niece (of course) that I had been planning for awhile.  I had found a pack of fabric squares on sale at Joannes and thought it would be fun to make some fabric blocks. 


I only had time to make one this week, but the plan is to make several.  All I did was sew six squares together and stuff them.


The shape is a little wonky.  Anyone have any suggestions for this?  


Want to see more Iron Craft pieces?  Check out the flickr group here.  Want to join in the fun?  Check out the blog here.

Wednesday, November 16, 2011

IC#46- Handmade Felt Ornaments

Our Iron Craft Challenge this week was to make something for the holidays.  I recently signed up for an ornament swap on Creating the Hive and this seemed like the perfect week to get started on my ornaments.  I need to create 13 ornaments; 12 will go into sets for others and one will go to the organizer.  In return, I will get my own set of 12 unique handmade ornaments.  Cool, huh?


I bought some fun colored felt and played around a bit.  I settled on making felt flowers.  I was first inspired by this project, although mine were a bit more colorful.


I sewed buttons on the front and ribbons on the back.  What do you think?


Want to see more Iron Craft pieces?  Check out the flickr group here.  Want to join in the fun?  Check out the blog here.

Tuesday, October 18, 2011

New Painted Pendants

I've been evolving my style quite a bit as time goes by.  My most recent project is painted pendants.  I'm using fabric and wood like before, but I'm adding in some of my bird images and more painting. 


I've done both sides with different images/patterns so the necklaces are reversible.  Now I just need to add a chain and photograph so I can get them listed in my shop.


Saturday, September 10, 2011

Fall Items in the Shop

I have finished a few fall-themed magnet sets!  I have them listed in pairs.  These have been a lot of fun to make and I think a few more will have to be created soon.

Pumpkin and Leaves

Pumpkin and Acorn

Pumpkin and Leaf


Friday, August 19, 2011

Stunning Onesies

When I saw a recent blog post by Alisa Burke, I was blown away.  She created these onesies using puff paint.  When I think of puff paint, I remember those ugly t-shirts we made as kids.  With the glitter paint and maybe some fake jewels glued on.   These onesies are not like that.  

 You can see one image below but click here for the full post.  You won't be sorry.


Thursday, August 11, 2011

Handkerchief Suggestions?

Lately I've been collecting cute vintage handkerchiefs.  I look whenever I go to a thrift store and often find one or two.  Now, I just have to decide what to do with them!  I've seen people do things like make table runners or curtains, but I don't think that is an ideal match for our current apartment style.   

Anyone have any suggestions?


Monday, August 8, 2011

Vendor Apron from Pillowcase Tutorial

This project started because I am cheap and lazy.  I have seen other craft vendors wearing these cute little half aprons at shows and have been wanting one.  But I didn't want to pay a lot for it nor spend hours creating one.  After some thrift store wanderings, I came up with this pillowcase apron.  See below for the tutorial.


Start by cutting the bottom 10" or so off the bottom (closed end). 


Next, fold up the cut end twice so that the folded end lines up with the hemmed edge of the open side.  If this is confusing, you can look at the diagram I included at the end.  The reason I folded over twice rather than just folding up once was because it allowed me to skip hemming that edge as well as give the apron a little extra thickness.

Folded Over Once- Need to fold over again.

Now, sew along the two edges as well as two times in the middle; this will give you three pockets.  Just measure your pillowcase to know where the seams should go; I had to measure in about 7" from each side.


For the ties, I used thick ribbon but this is also open to your own interpretation.  I ran the ribbon lightly through a match to seal the ends and prevent fraying.   Then I folded down the edge and sewed it to the front of the apron.


That's it!  I liked this project because it was SUPER short and easy.  It also is open to lots of tweaks and personalization.  Fabric appliques, extra pockets, contrasting edging, etc.  If anyone makes one, I would love to see it, so please share the link in the comments.


Summary Diagram

Saturday, August 6, 2011

Freezer Paper Stencil- Smokin' Dreams

While visiting family in KS, I had the fun of helping my brother out with an art project.  He and his friends have a BBQ team called Smokin' Dreams.  They make pretty awesome food and will be cooking at some local events in Kansas City.  The only thing missing, team shirts!  They already had a logo which you can see here on a drink coozy (is there a correct way to spell that?) 


We decided to put the logo on the front corner of the shirt and then add a dreaming pig on the back.  I found a pig image online and then edited it a bit to get the dream bubble and simplify some of the lines.  Then we used this tutorial to do a freezer paper stencil.  It was my first time doing it!


It actually turned out really well.  There are a few smudges which makes me think I may have to be more careful around some of the delicate parts of the stencil.  We're hoping to make a few more so I'm excited.